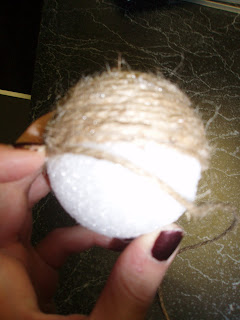
In steps another inspiration: V and Co. This lady is super creative. I'm not so creative, but I can follow step-by-step tutorials. So I did.
Stuff I used:
- Foam balls
- Twine (called "jute somethingorother" at Jo Ann's... it's with the jewelry stuff for some reason. I mean who wants a necklace with this scratchy stuff? But I digress...)

- Broom and dust pan (more on that later)
- Gather your stuff.
- Occupy your kid.
- Plug in your glue gun.
- Anticipate burning your fingers.

Then:
- Make a little twisty with the end of the twine. Put a dab of hot glue on the foam ball and stick the twisty end on it. Hold it there and take a deep breaths so you don't swear with your child is in ear shot.
Please ignore chipped nails... I can only do one project per night and nails count as one.
- Once it cools, put a little bead of glue along the side opposite of your finger. Wrap the twine around, hold it for a second and repeat.
- Keep gluing and wrapping until you hear a crash.


- Repeatedly say "danger" and "owie" and "sit" (that last one was for the dogs) trying to keep your loved ones away from the shattered Pyrex dish.
- Sweep it up with a broom and dust pan.
- Resume gluing, wrapping and not swearing until the ball is almost completely covered.
- To end, fill the remaining little circle with hot glue, trim the twine and twist it into the glue dot. Hold it place with something other than your finger.
- Voila! Fill a centerpiece with your lovely, shabby chic, inexpensive twine balls. (OK, I'm not done with all of them, but you get it. )


What I would do differently:
- Use bigger balls (he he... bigger balls...ah hem...)
- Not use foam balls... you could use ANY balls really. So I will be checking the dollar store for a less expensive option. (Not that the foam balls broke the bank.)
- Make sure there was no glass in the cupboard where Ben Ben was playing... rookie mom mistake, I guess. But honestly, wouldn't you think Pyrex would hold up better? I would. Oh well...


No comments:
Post a Comment